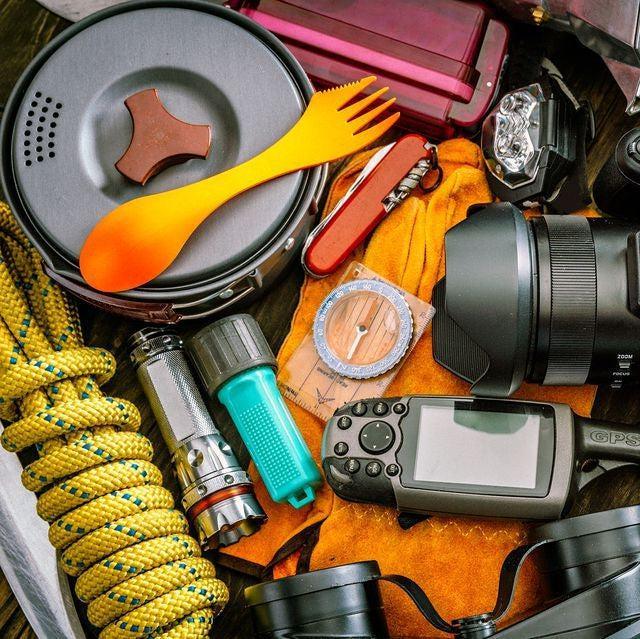

In the world of survival and self-reliance, securing access to clean, safe water isn't just a priority; it's a fundamental skill. Emergencies and crises can strike unexpectedly, and in those moments, self-sufficiency is your lifeline. In this comprehensive guide, we'll take you through the process of creating a DIY water filtration system, a crucial skill every survivalist should master.
Gather Your Supplies: What You'll Need
Before diving into the details, ensure you have all the necessary materials:
- Two Rugged Containers: Opt for durable buckets or food-grade containers.
- A Drill with a ¼-inch Bit: This tool is essential for creating holes in your containers.
- Sand, Gravel, and Activated Charcoal: These are your filtration essentials.
- A Clean Cloth or Coffee Filter: Use this to filter out larger particles.
- Access to a Water Source: Find a nearby water source, such as a river, lake, or pond.
The Step-by-Step Process: Building Your DIY Water Filtration System
Step 1: Preparing Your Containers
Begin by prepping your first container. Drill multiple small holes in the bottom; this top container will hold the unfiltered water. The second container, positioned underneath, will collect the purified water.
Step 2: Layering the Filtration Media
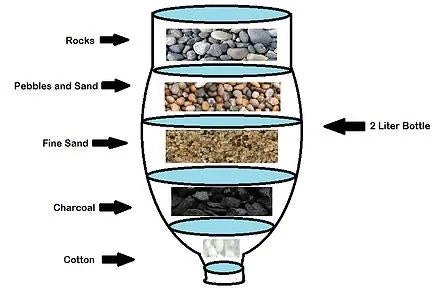
Now, let's get down to business. In the top container with holes, stack layers of filtration media, each with a crucial role:
- Activated Charcoal: Start with a generous layer of activated charcoal. It's a powerful absorbent that eliminates impurities and odors from the water.
- Clean Cloth or Coffee Filter: Add a layer of clean cloth or a coffee filter above the charcoal. This prevents charcoal from mixing with the subsequent layers.
- Sand: Introduce a layer of clean sand above the cloth. Sand effectively removes larger particles and sediment from the water.
- Gravel: Finish the layers with clean gravel, providing a final filtration stage.
Step 3: Collecting the Purified Water
Now, set up the system for action. Position the top container (with the filtration layers) over the bottom container. As you pour unfiltered water into the top container, it will gradually filter through the layers, collecting in the bottom container as clean, purified water.
Step 4: Monitoring and Maintenance
Stay vigilant during the filtration process. As the media becomes clogged over time, water flow will slow. Regular maintenance is crucial to keep the system running efficiently. Replace the filtration media when it becomes saturated.
Safety Protocols: Ensuring Clean and Safe Drinking Water
- Boiling the Purified Water: Even after filtration, it's wise to boil the water for at least one minute. This additional step ensures that any remaining pathogens are neutralized.
- Pre-Filtering Large Debris: If your water source contains significant debris, pre-filter it through a cloth or mesh before introducing it to your DIY filtration system. This proactive measure helps prevent clogs and ensures consistent filtration.
By diligently following these steps and implementing safety protocols, you'll master crafting a DIY water filtration system, turning even murky water into a reliable source during emergencies. In the world of survival and self-reliance, securing clean water is a vital skill. This system can be your lifeline when traditional water sources are compromised.
Empower yourself with this actionable knowledge and take immediate action. Maintain the spirit of self-sufficiency, stay prepared, and ensure you're equipped to thrive when challenges arise.
